What Native Forb Seeds are Ready for Harvesting at This Time? (Mid-June)

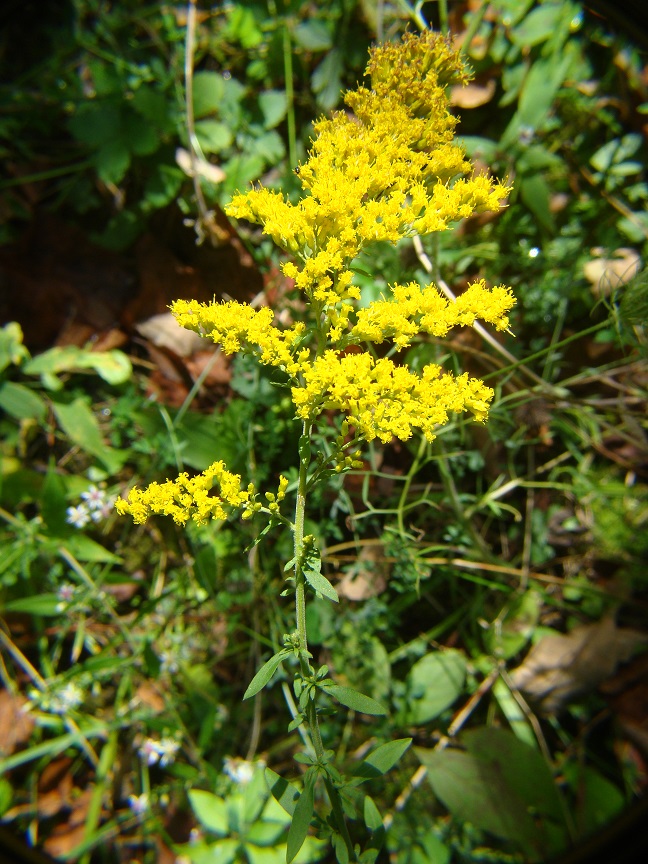
At this time, the seeds of Wild Geranium (Geranium maculatum) are likely ready for harvest.

Wild Geranium emerges from the ground, flowers, sets seed and disperses its seed by mid-June to early July. Wild Geranium is an easy to establish woodland plant, particularly for woodlands in association with oaks and hickories.  Use it in shady borders, native plant gardens or open woodland gardens. Once established, Wild Geranium will readily self-sow and may form large patches.
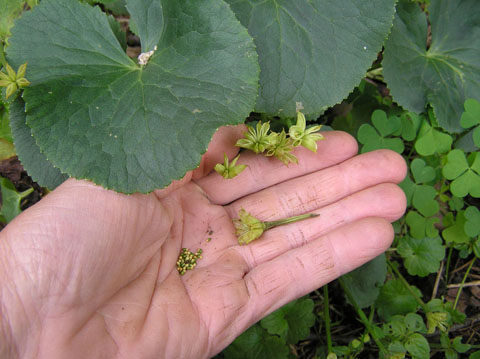
Photo Credit: https://hort.extension.wisc.edu/articles/wild-geranium-geranium-maculatum/

Seed Collection:

Visual clues for the right stage for collecting the seed: L to R – unripe, ripe, too late.
NOTE: These are seeds from Geranium pratense.
Photo Credit: https://www.rosybee.com/blog/2020/7/collecting-geranium-seeds

Distinctive fruit capsules are produced 3-5 weeks after the plant blooms. The long, central beak-like column (resembling a crane’s head) starts out bright green and turns dark brown when ripe.

Photo Credit: https://wildeherb.com/wp-content/uploads/2010/07/geranium-wild-beak-seed.jpg

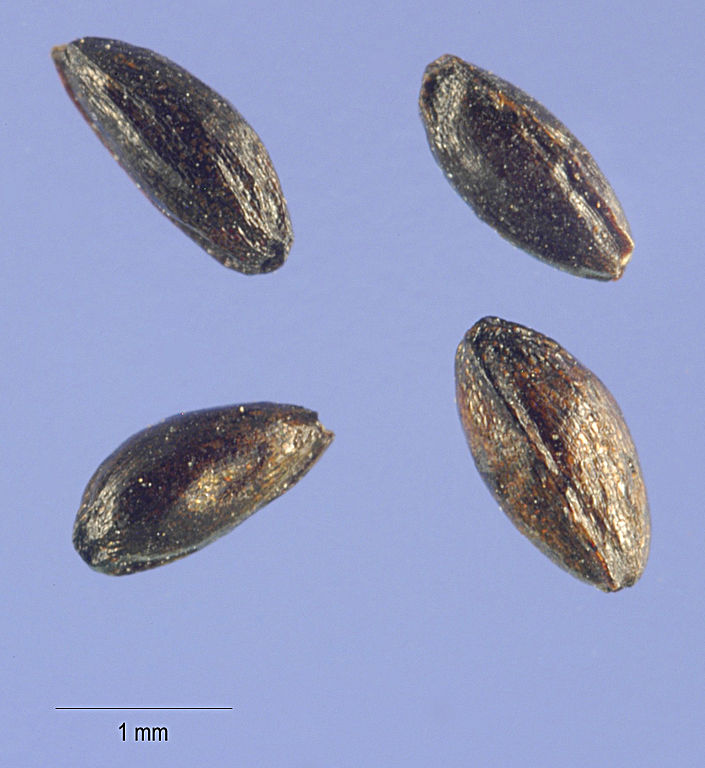
The bulbous base has five cells, each containing a large black seed. As the seed matures, the central column begins to dry. As it dries, it begins to bow creating a coiled tension. Eventually the tension is released by catapulting the seed away from the plant. Monitor the seed closely at this stage and collect the seed heads as they change from green to brown or as the first seeds are dispersed.

The seed capsule splits open with five seeds at the curled base.
Photo Credit: https://wildeherb.com/2010/07/03/wild-geraniums-gone-to-seed/

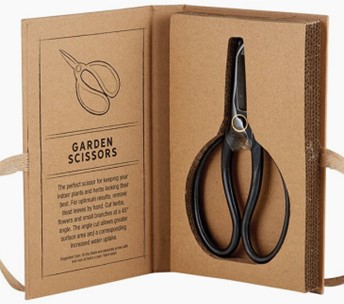
Collect them by carefully cuppying your hand around a pair (they tend to grow in pairs) of ripe seedheads and cutting with garden scissors. Do not pull the seedheads from the plant as that runs the risk of triggering the plant to eject its seeds.

Watch a very brief slow-motion video of a seedpod ejecting each of its five seeds.

Photo Credit: (c) 2007 Katy Chayka,
https://www.minnesotawildflowers.info/flower/wild-geranium#lboxg-4

Processing of Harvested Seed and Storage:

Photo Credit: https://awaytogarden.com/the-season-for-saving-seed-with-ken-druse/

Place the seedheads in a closed paper bag (to ensure that none of the seeds are catapulted elsewhere) and leave them to fling open by themselves for a week or so.

Photo Credit:
https://www.prairiemoon.com/geranium-maculatum-wild-geranium-prairie-moon-nursery.html

Seed can be stored dry for a couple of weeks, but should be kept in moist potting soil for long term storage.  Seed requires 2 to 3 months of cold/moist stratification prior to germination.

Photo Credit: https://theherbalacademy.com/cold-stratification-herb-gardening/

Carefully empty the seeds from the paper bag into a labeled ziplock bag (plant name and date); then partially fill it (1/3 full) with moist potting soil and seal the top.  Carefully mix the seeds into the moist soil by gently shaking the bag, inverting the bag, and also gently pressing on the outside of the bag with your fingers. Leave in the refrigerator for 60-90 days before germinating.

Propagation by Seed:

Most seed will germinate reliably the following spring after 2 to 3 months cold/moist stratification. Seeds will have higher germination rates the longer the cold period.

When sowing the seeds in the fall, plant each 1/8 inch deep in a prepared seed bed so that the seed overwinters and germinates naturally in spring.

Peat cells are biodegradable and easy to use.
Photo Credit: valkyrieh116 (https://www.flickr.com/photos/valkyrieh116/4360193931/)

When beginning plants indoors after cold/moist stratification of your harvested seeds, plant each seed no deeper than 1/8th of an inch into your potting mix. Keep the soil of each container moist until germination occurs. They should not be allowed to dry out. Germination takes seven to 10 days.  Then transplant the contents of each container into the spots you’ve selected to establish these plants.

Seed-started plants will flower two to three years after sowing.

Wild Geranium

Happy harvesting!

What Native Forb Seeds are Ready for Harvesting at This Time? (Late May)

At this time, the seeds of Marsh Marigold (Caltha palustris) are likely ready for harvest.

Marsh Marigold emerges from the ground, flowers, sets seed and disperses its seed by early June and then goes dormant by early summer. Marsh Marigold is an ideal plant for use in those wet places where few other plants will grow.  The seed is easy to collect and plant and germination rates are high.

Photo Credit: https://www.midwestgardentips.com/specialty-garden-types/best-plants-for-wet-soil

CAUTION! – It has been reported that all parts of this plant can be a skin irritant to some people, possibly resulting in rashes and dermatitis.  Accordingly, it may be best to wear gloves while harvesting seedpods.

Photo Credit: http://www.whiteoaknursery.biz/seed_prop/Caltha_palustris_seed.shtml

Seed Collection:

Seeds mature in late May to early June and they are contained in clusters of tiny upright pods that split open when mature. Each seed is quite small, about the size of a grain of table salt. The pods change from light green to yellowish brown when they mature. As the pods dry, each will split open to release its seeds. Each capsule may hold several dozen of these tiny seeds.

Photo Credit: USDA, NRCS. 2016. The PLANTS Database (http://plants.usda.gov, 13 February 2016). National Plant Data Team, Greensboro, NC 27401-4901 USA., Public domain, via Wikimedia Commons

Collect seed stalks with pods attached when they first begin to change color and as the earliest pods begin to split. To do so, simply cut the seed pods off the flower stems with a sharp knife or garden scissors.

Photo Credit:
https://www.ecofriendlyincome.com/blog/how-to-propagate-marsh-marigolds-caltha-palustris

Processing of Harvested Seed and Storage:

Photo Credit: https://awaytogarden.com/the-season-for-saving-seed-with-ken-druse/

Place seed stalks inside a paper bag to allow them to dry.  After a week or two, the pods should have opened; simply shake the bag to release all of the seed.  Do not let seed dry out any further as germination may suffer.

Photo Credit: https://theherbalacademy.com/cold-stratification-herb-gardening/

Carefully empty the seeds from the paper bag into a labeled ziplock bag (plant name and date); then partially fill it (1/3 full) with moist potting soil and seal the top.  Carefully mix the seeds into the moist soil by gently shaking the bag, inverting the bag, and also gently pressing on the outside of the bag with your fingers. Leave in the refrigerator for 60-90 days before germinating.

Propagation by Seed:

Peat cells are biodegradable and easy to use.
Photo Credit: valkyrieh116 (https://www.flickr.com/photos/valkyrieh116/4360193931/)

Lightly sprinkle seed over flats of potting mix and keep the soil of each container moist until germination occurs. Germination can take five to 10 days.  Then transplant the contents of each container into the spots you’ve selected to establish these plants.  Alternatively, if sowing outdoors, simply sprinkle the contents of each ziplock bag onto areas where you want the plants to establish:  (a) saturated bare soils, or (b) on top of standing water (such as a pond) to allow the seeds to naturally disperse.

Seed-started plants may take about three years to mature and bloom.

Marsh Marigold in bloom

For more information about Marsh Marigold, please view my prior post, What Wildflower Begins Blooming This Week? (April week 3) (published on 4/20/2024).

Happy harvesting!

What Native Forb Seeds are Ready for Harvesting at This Time? (November)

At this time, the seeds of Heart-leaved Aster (Symphyotrichum cordifolium) are likely ready for harvest.

Heart-leaved Aster emerges from the ground, flowers for four weeks (beginning week 2 of August), sets seed and disperses its seed in November. It is commonly found in woodlands, meadows, or along stream banks.  It can be weedy as it self-seeds very easily and creeps slowly by rhizome as well. In this manner it is not always a great choice for formal flowerbeds, but can be perfect for extending color and interest in the woodland shade garden to add some late-season blooms.

Photo Credit: Penny Longhurst,
https://wcbotanicalclub.org/buck-spring-nature-trail/heart-leaved-aster-symphyotrichum-cordifolium/

Seed Collection:

Photo Credit: (c) 2016 Katy Chayka,
https://www.minnesotawildflowers.info/flower/blue-wood-aster#lboxg-5

Fruit is a dry, light brown to purplish, 4- to 5-veined cypsela, about 1/10” long, with tufts of white or rosy tinged hairs (pappus) for wind dispersal.

Collect them by carefully cupping your hand around the ripe seedhead (to minimize them blowing away) and cutting the plant stem with garden scissors.

Processing of Harvested Seed and Storage:

Photo Credit: https://awaytogarden.com/the-season-for-saving-seed-with-ken-druse/

Place the seedheads in a closed paper bag (to ensure that they won’t blow away) and leave them for a few weeks.

After you have let them dry, finish removing the remaining seeds by plucking the individual flowers from each stem with your fingers. Discard the stems.  After you are done with the seedheads, carefully pour any remaining seeds from the paper bag used to dry the seedheads into a paper envelope for storage.

It is okay if the fluff remains attached to each seed, as it will not affect germination.  Accordingly, it is probably best not to attempt to remove the fluff from the seeds as it may be difficult to do so and you also increase the likelihood of spilling your seeds in that process.

Photo Credit: (c) 2016 MinnesotaWildflowers.info,
https://www.minnesotawildflowers.info/flower/blue-wood-aster#lboxg-6

Heart-leaved Aster seeds can be stored and should remain viable for up to a couple of years in a paper envelope.

Seed requires several weeks of cold/moist stratification prior to germination.

Photo Credit: https://theherbalacademy.com/cold-stratification-herb-gardening/

If you intend to grow seedlings for later transplant, place moistened peat or paper towels into a labeled ziplock bag (plant name and date) and then carefully empty the seeds from the paper bag into the ziplock bag.  Leave in the refrigerator for 60 days before germinating.

Propagation by Seed:

It is probably best to simply sow your harvested seeds on the surface of a prepared seed bed (seeds need light to germinate) in late fall so that the seed overwinters and germinates naturally in spring.

Peat cells are biodegradable and easy to use.
Photo Credit: valkyrieh116 (https://www.flickr.com/photos/valkyrieh116/4360193931/)

Alternatively, you may begin plants indoors after cold/moist stratification of your harvested seeds.  To do so, lightly press the seeds into top of your slightly moistened potting mix (seed needs light to germinate). Keep the soil of each container moist until germination occurs. They should not be allowed to dry out. Germination takes about two weeks.  Then transplant the contents of each container into the spots you’ve selected to establish these plants.

Seed-started plants may flower in the year that they are sown.

Heart-leaved Aster

Happy harvesting!

What Native Forb Seeds are Ready for Harvesting at This Time? (Late October)

At this time, the seeds of Hairy White Oldfield Aster (Symphyotrichum pilosum) are likely ready for harvest.

Hairy White Oldfield Aster emerges from the ground, flowers for six weeks (beginning week 1 of August), sets seed and disperses its seed from late October into November. It is found on forest edges, meadows, prairies, or open woodlands and readily pops up in vacant lots, fields, ditches, or anywhere there is bare soil via aggressive self-seeding. In this manner it is not always a great choice for formal flowerbeds, but can be a great addition to wildflower meadows or perennial borders to add some late-season blooms.

Photo Credit: Franco Fenaroli,
http://luirig.altervista.org/cpm/albums/bot-060/symphyotrichum-pilosum3192.jpg

Seed Collection:

Fruit is a dry seed (achene) with a tiny tuft of white hairs (pappus, whose size is less than the width of the point of a new crayon), linear-oblong in shape, slightly flattened, grayish, and faintly ribbed.

Collect them by carefully cupping your hand around the ripe seedhead (to minimize them blowing away) and cutting the plant stem with garden scissors.

Processing of Harvested Seed and Storage:

Photo Credit: https://awaytogarden.com/the-season-for-saving-seed-with-ken-druse/

Place the seedheads in a closed paper bag (to ensure that they won’t blow away) and leave them for a week or two.

After you have let them dry, finish removing the remaining seeds by plucking the individual flowers from each stem with your fingers. Discard the stems.  After you are done with the seedheads, carefully pour any remaining seeds from the paper bag used to dry the seedheads into a paper envelope for storage.

It is okay if the fluff remains attached to each seed, as it will not affect germination.  Accordingly, it is probably best not to attempt to remove the fluff from the seeds as it may be difficult to do so and you also increase the likelihood of spilling your seeds in that process.

Hairy White Oldfield Aster seeds can be stored and should remain viable for up to a couple of years in a paper envelope.

Seed requires a few months of cold/moist stratification prior to germination.

Photo Credit: https://theherbalacademy.com/cold-stratification-herb-gardening/

If you intend to grow seedlings for later transplant, place moistened peat or paper towels into a labeled ziplock bag (plant name and date) and then carefully empty the seeds from the paper bag into the ziplock bag.  Leave in the refrigerator for 3-4 months before germinating.

Propagation by Seed:

It is probably best to simply sow your harvested seeds on the surface of a prepared seed bed (seeds need light to germinate) in late fall so that the seed overwinters and germinates naturally in spring.

Peat cells are biodegradable and easy to use.
Photo Credit: valkyrieh116 (https://www.flickr.com/photos/valkyrieh116/4360193931/)

Alternatively, you may begin plants indoors after cold/moist stratification of your harvested seeds.  To do so, lightly press the seeds into top of your slightly moistened potting mix (seed needs light to germinate). Keep the soil of each container moist until germination occurs. They should not be allowed to dry out. Germination takes about two weeks.  Then transplant the contents of each container into the spots you’ve selected to establish these plants.

Seed-started plants may flower in the year that they are sown.

Hairy White Old-field Aster

Happy harvesting!

What Native Forb Seeds are Ready for Harvesting at This Time? (Mid-October)

At this time, the seeds of Tall Goldenrod (Solidago altissima ssp. altissima) are likely ready for harvest.

Tall Goldenrod emerges from the ground, flowers (beginning week 2 of August), sets seed and disperses its seed by mid- to late October. It is a native perennial flower that is found on old fields, pastures, road banks, and disturbed soil; it clearly does best in dry open areas. Tall Goldenrod often forms dense patches in successional fields and is one of our most common goldenrods. Consider using it in large borders or in a managed meadow. Tall Goldenrod develops many creeping rhizomes that cause the plant to cluster; therefore, it is not recommended for smaller planting areas.

Photo Credit: (c) 2013 Peter M. Dziuk,
https://www.minnesotawildflowers.info/flower/tall-goldenrod#lboxg-12

Seed Collection:

Tall Goldenrod ready for harvest

When looking for this particular species of goldenrod, it often has large insect galls on the mid- to upper portions of the main plant stem.

Fruit is a dry seed (cypsela) with a tuft of whitish hairs (pappus) about 1/10” long attached at the tip to allow it to be carried off in the wind.

Collect them by carefully cupping your hand around the ripe seedhead (to minimize them blowing away) and cutting the plant stem with garden scissors.

Processing of Harvested Seed and Storage:

Photo Credit: https://awaytogarden.com/the-season-for-saving-seed-with-ken-druse/

Place the seedheads in a closed paper bag (to ensure that they won’t blow away) and leave them for a week or two.

Clipped and ready to clean off stem.
Photo Credit: https://wildfoods4wildlife.com/monographs/goldenrods/

After you have let them dry, finish removing the remaining seeds by stripping each stem piece by piece through your fingers. Discard the stems.  After you are done with the seedheads, carefully pour any remaining seeds from the paper bag used to dry the seedheads into a paper envelope for storage.

It is okay if the fluff remains attached to each seed, as it will not affect germination.  Accordingly, it is probably best not to attempt to remove the fluff from the seeds as it may be difficult to do so and you also increase the likelihood of spilling your seeds in that process.

Photo Credit: (c) 2016 MinnesotaWildflowers.info,
https://www.minnesotawildflowers.info/flower/tall-goldenrod#lboxg-7

Tall Goldenrod seeds can be stored and should remain viable for up to a couple of years in a paper envelope.

Seed requires two months of cold/moist stratification prior to germination.

Photo Credit: https://theherbalacademy.com/cold-stratification-herb-gardening/

If you intend to grow seedlings for later transplant, place moistened peat or paper towels into a labeled ziplock bag (plant name and date) and then carefully empty the seeds from the paper bag into the ziplock bag.  Leave in the refrigerator for 60 days before germinating.

Propagation by Seed:

It is probably best to simply sow your harvested seeds on the surface of a prepared seed bed (seeds need light to germinate) in late fall so that the seed overwinters and germinates naturally in spring.

Peat cells are biodegradable and easy to use.
Photo Credit: valkyrieh116 (https://www.flickr.com/photos/valkyrieh116/4360193931/)

Alternatively, you may begin plants indoors after cold/moist stratification of your harvested seeds.  To do so, lightly press the seeds into top of your slightly moistened potting mix (seed needs light to germinate). Keep the soil of each container moist until germination occurs. They should not be allowed to dry out. Germination takes about two weeks.  Then transplant the contents of each container into the spots you’ve selected to establish these plants.

Seed-started plants may flower in the year that they are sown.

Happy harvesting!

What Native Forb Seeds are Ready for Harvesting at This Time? (October)

At this time, the seeds of Turtlehead (Chelone glabra) are likely ready for harvest.

Turtlehead blooms for approximately four weeks (beginning in week 1 of September), sets fruit and then its seeds become ripened in October. It can be found in swamps, marshes, ditches, and wet thickets. This perennial herbaceous plant makes an excellent choice for wetland plantings or the edges of ponds or streams. Once established, Turtlehead spreads slowly over time from short rhizomes and self-seeding.

Photo Credit: (c) 2009 K. Chayka,
https://www.minnesotawildflowers.info/flower/white-turtlehead#lboxg-4

Seed Collection:

PLEASE NOTE:  Turtlehead (Chelone glabra) is protected under New York State Law. It is a violation of the Environmental Conservation Law §9-1503 to collect or destroy listed plants without the permission of the landowner. The regulation gives landowners additional rights to prosecute people who collect plants without permission.

Pea-shaped seed capsules may follow the flowers, starting out green and then turning brown and splitting open when mature, containing a number of medium brown to dark brown seeds, each about 1/8 inch wide and pointed at the ends.

Photo credit: (c) 2009 K. Chayka,
https://www.minnesotawildflowers.info/flower/white-turtlehead#lboxg-3

Seed is easily collected by collecting the brown seedheads before their individual capsules open.

To harvest seed from Turtlehead, carefully hold the stalk below the seedhead and cut the stalk below your hand, using garden scissors. Note that a single cluster of capsules will contain numerous seeds. Without turning the seedheads upside down, move the seedhead into a paper bag.

Processing of Harvested Seed and Storage:

Photo Credit: https://awaytogarden.com/the-season-for-saving-seed-with-ken-druse/

Place the seed capsules in a closed paper bag and leave them for a week or so.

Then, over a paper plate, pick up the seedheads from the bag, and just gently and carefully crush them on the plate. The seeds should then easily spill out. To separate the chaff from the seeds, use a mesh strainer.

Photo Credit: https://botanicallyinclined.org/fridays-seeds-the-turtleheads-chelone/

After you are done processing the seedheads, carefully pour any remaining seeds from the paper bag used to dry the seedheads into a paper envelope for storage.

Turtlehead seeds can be stored and should remain viable for 1-2 years in a paper envelope.

Seed requires three to four months of cold/moist stratification prior to germination.

Photo Credit: https://theherbalacademy.com/cold-stratification-herb-gardening/

Place moistened peat or paper towels into a labeled ziplock bag (plant name and date) and then carefully empty the seeds into the ziplock bag.  Leave in the refrigerator for 3-4 months before germinating.

Propagation by Seed:

It is probably best to simply sow your harvested seeds in late fall so that the seed overwinters and germinates naturally in spring.  Seed should be sown on the surface (they require light for germination).

Peat cells are biodegradable and easy to use.
Photo Credit: valkyrieh116 (https://www.flickr.com/photos/valkyrieh116/4360193931/)

Alternatively, you may begin plants indoors after cold/moist stratification of your harvested seeds.  To do so, seeds should be placed on the surface of your potting mix (they require light for germination). Keep the soil of each container moist until germination occurs. They should not be allowed to dry out. Germination requires 3-5 weeks. Then transplant the contents of each container into the spots you’ve selected to establish these plants.

Seed-started plants will likely flower two years after sowing.

To learn more about this native wildflower, please view my prior post What Wildflower Begins Blooming This Week? (Sept week 1), published on 9/4/2021.

Happy harvesting!

What Native Forb Seeds are Ready for Harvesting at This Time? (September)

At this time, the seeds of Enchanter’s Nightshade (Circaea canadensis) are likely ready for harvest.

Enchanter’s Nightshade blooms for approximately one month (beginning in week 4 of June), sets fruit and then its seeds become ripened by September. This herbaceous perennial can be found in woodland settings with dappled sunlight or medium shade. It can be used in a woodland setting, naturalized area, or shady garden. Once established, it spreads by both seed and rhizomes, often creating small colonies.

Photo Credit: (c) 2010 Katy Chayka,
https://www.minnesotawildflowers.info/flower/enchanters-nightshade#lboxg-6

Seed Collection:

Photo Credit: https://plants.ces.ncsu.edu/plants/circaea-lutetiana-subsp-canadensis/

Fruit is an oval 2-chambered seed capsule 2.8 to 4.5 mm long and covered in hooked hairs that attach themselves to anything that passes by. When mature, the capsule turns brown, but it does not split open and it has several distinct ribs or grooves on its surface.

Photo Credit: http://www.mpnature.com/plants/pages/hf_enightshade.html

Collect them by carefully cutting the plant stem containing the ripe capsules with garden scissors while attempting to avoid having each attaching itself to you.

Processing of Harvested Seed and Storage:

Photo Credit: https://awaytogarden.com/the-season-for-saving-seed-with-ken-druse/

Place the seed capsules in a closed paper bag and leave them for a week or so.

Since the capsules do not open and each is attached to the plant stem by a short stalk, there may not be much reason to thresh the seed capsules.  However, do remove each seed capsule from the larger plant stem.

Photo Credit: https://www.weberseeds.de/circaea-lutetiana.html

Enchanter’s Nightshade seeds can be stored and should remain viable for 1-2 years in a paper envelope.

Seed requires three to five months of cold/moist stratification prior to germination.

Photo Credit: https://theherbalacademy.com/cold-stratification-herb-gardening/

Place moistened peat or paper towels into a labeled ziplock bag (plant name and date) and then carefully empty the seeds from the paper bag into the ziplock bag.  Leave in the refrigerator for 90-140 days before germinating.

Propagation by Seed:

It is probably best to simply sow your harvested seeds on the surface of a prepared seed bed (seeds need light to germinate) in late fall so that the seed overwinters and germinates naturally in spring.

Peat cells are biodegradable and easy to use.
Photo Credit: valkyrieh116 (https://www.flickr.com/photos/valkyrieh116/4360193931/)

Alternatively, you may begin plants indoors after cold/moist stratification of your harvested seeds.  To do so, plant each seed no deeper than 1/4 inch into your potting mix. Keep the soil of each container moist until germination occurs. They should not be allowed to dry out. Germination is notoriously irregular and slow, requiring up to 3-4 weeks. Then transplant the contents of each container into the spots you’ve selected to establish these plants.

Seed-started plants will flower two to three years after sowing.

Enchanter’s Nightshade

To learn more about this native wildflower, please view my prior post What Wildflower Begins Blooming This Week? (June week 4), published on 6/27/2020.

Happy harvesting!

What Native Forb Seeds are Ready for Harvesting at This Time? (Late August)

This post is the first in what will become an ongoing occasional series each year when the seeds of native forbs have ripened and would be ready for your harvest should you wish to add those native plants to your garden or home landscape.

At this time, the seeds of Hairy Beardtongue (Penstemon hirsutus) are likely ready for harvest.

Hairy Beardtongue blooms for approximately 4-6 weeks (beginning in week 2 of June), sets fruit and then its seeds become ripened by late August and September. This herbaceous perennial can be found in forests, glades, forest margins, rocky woodlands, and along roadsides. It is great for borders, cottage gardens, rock gardens, and pollinator gardens. Once established, Hairy Beardtongue will readily self-sow.

Photo Credit: https://growitbuildit.com/hairy-beardtongue-penstemon-hirsutus/

Seed Collection:

Photo Credit: https://growitbuildit.com/how-to-save-penstemon-beardtongue-seed/

Usually about six weeks after blooming, the fruit that forms is a capsule (a dry fruit derived from a compound pistil that contains many seeds) that is roughly 1/4″ to 3/16″ diameter. When the capsule turns brown and hard, the seed should be ripe. If left alone, these capsules will linger throughout the winter until the following spring, with many splitting open naturally throughout the winter.

Photo Credit: https://growitbuildit.com/how-to-save-penstemon-beardtongue-seed/

Collect them by carefully cutting the branched plant stem with garden scissors containing the ripe capsules. Do not pull the capsules from the plant as that runs the risk of popping them open and spilling their tiny seeds.

Processing of Harvested Seed and Storage:

Photo Credit: https://awaytogarden.com/the-season-for-saving-seed-with-ken-druse/

Place the seedheads in a closed paper bag (to ensure that none of the seeds are lost as the seed capsules dry out) and leave them for a week or so.

Photo Credit: https://growitbuildit.com/how-to-save-penstemon-beardtongue-seed/

Then thresh the seedheads by simply reaching into the bag and squeezing the capsules or use a dough roller over the bag to pop the capsules to separate the seeds from the husk. Sift seed through a sieve or common kitchen strainer to remove the chaff.

Photo Credit:
https://www.prairiemoon.com/penstemon-hirsutus-hairy-beardtongue-prairie-moon-nursery.html

Hairy Beardtongue seeds can be stored and should remain viable for up to a couple of years in a paper envelope.

Seed requires one to two months of cold/moist stratification prior to germination.  If stratified, germination rates are 65%-80%.

Photo Credit: https://theherbalacademy.com/cold-stratification-herb-gardening/

Place moistened peat or paper towels into a labeled ziplock bag (plant name and date) and then carefully empty the seeds from the paper bag into the ziplock bag.  Leave in the refrigerator for 30-60 days before germinating.

Propagation by Seed:

It is probably best to simply sow your harvested seeds on the surface of a prepared seed bed (seeds need light to germinate) in late fall so that the seed overwinters and germinates naturally in spring.

Peat cells are biodegradable and easy to use.
Photo Credit: valkyrieh116 (https://www.flickr.com/photos/valkyrieh116/4360193931/)

Alternatively, you may begin plants indoors after cold/moist stratification of your harvested seeds.  To do so, place seed on top of your slightly moistened potting mix (seed needs light to germinate). Keep the soil of each container moist until germination occurs. They should not be allowed to dry out. Germination takes 10-21 days.  Then transplant the contents of each container into the spots you’ve selected to establish these plants.

Seed-started plants will flower two to three years after sowing.

Hairy Beardtongue

Happy harvesting!